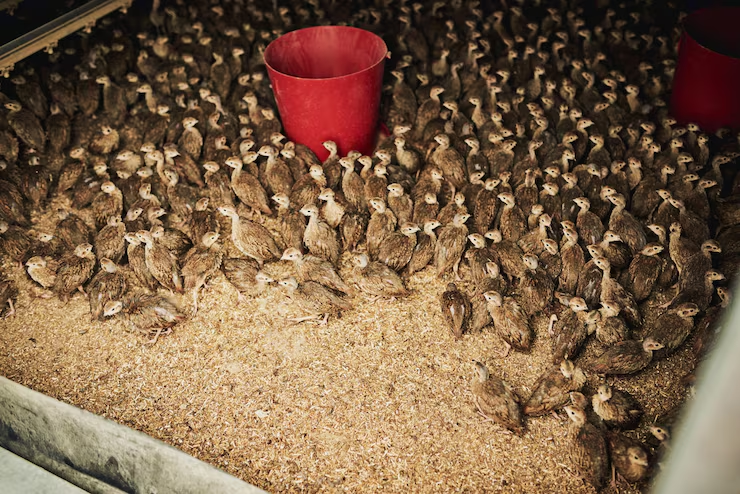
- November 5, 2024
- by admin
- Game Bird & Wild Bird Feeds
Getting Started with Quail Farming
Quail have been raised for centuries—revered in Japan, known as “Bible quail” by early American settlers, and increasingly favored by modern urban farmers. The most beginner-friendly species is the Coturnix quail (Coturnix coturnix) due to its small size, rapid maturity, and disease resistance. These birds are ideal for compact urban setups like garages, balconies, or basements. A starter flock of 20 birds (12 females and 8 males) is optimal, with males being polygamous and a 2:1 female-to-male ratio ensuring good fertility. Coturnix quail begin laying eggs at just six weeks of age and can be harvested for meat as early as four to five weeks. Their meat is lean and nutrient-rich, while eggs, weighing about ⅓ ounce, are proportionally larger than chicken eggs and contain less cholesterol. Once proficient with Coturnix, enthusiasts can move on to Eastern Bobwhite quail, which are larger, monogamous, and take around 14–16 weeks to start laying. These require equal numbers of males and females. While Bobwhites are more demanding, other ornamental species also exist but are typically raised for display rather than production. Legally, raising quail may require a game bird license from your local Department of Natural Resources, as quail are classified as wildlife in many regions—for example, the license fee in New Brunswick is ₹10 annually. Beginners are also encouraged to join game bird associations for support, breeder directories, newsletters, and access to quality stock. Examples include the Canadian Ornamental Pheasant and Game Bird Association and the American Pheasant and Waterfowl Society. When sourcing birds or eggs, always verify that the stock is disease-free and unrelated, as some hobby breeders may lack veterinary oversight. Lastly, the internet offers a wealth of useful resources, guides, and forums to assist at every step of your quail-raising journey.
Accommodations
Cages need to be ready prior to obtaining the birds. People who are handy with tools can build their own cages or you can buy a pre-fabricated cage. Rabbit hutches are also ideal for quail. These are made of welded wire, are strong and very durable. There’s also a sliding pan underneath for catching the droppings. I raise all my quail on wire. This prevents them from eating their faeces something which if left uncontrolled can result in a condition known as ulcerative enteritis causing sickness and even death.
I make all of my cages using one inch by one inch square welded wire for the sides and top; for the bottom I use one-half inch by one inch. You can buy the welded wire from your local farm co-op as well as the hog rings to attach the pieces together to form a cage. Size is a matter of personal choice and budget. My cages for Coturnix measure 24″W x 48″L x 16″H. For the door, you simply cut a square hole in the middle. Make it large enough for the biggest item you intend to place in the cage. Quail love to dust bathe so in all of my cages, I put a plastic stackable vegetable container from Canadian Tire and fill the bottom with clean sand. Feed troughs need to have a cover otherwise the birds will get in and scratch all of the feed out. The birds also need water. To provide water, the easiest thing I have found is a pop bottle fountain. These are made of plastic, snap securely on the neck of a bottle and project 2″ through the cage. It comes with a spring that you attach around the bottle to hold it against the cage. If you should ever get into this is a big way, then you will need to rig up an automatic watering system. Cages, feed troughs and watering devices may be obtained from any of the suppliers listed below.
Cage location
Location of the cage is also important. Inside the aviary, my cages are suspended on a wall using shelf brackets. Two holes large enough to be able to slide the cage along the metal brackets are cut on the back of the cage. I have eight cages, four in each row with newspapers beneath each cage on which to catch the droppings. Droppings are solid in nature making them easy to be collected, bagged, and dumped in a compost pile at a friends farm. If cages are put outside, make sure the birds are sheltered from cold, wind, sun, and rain. The birds will adapt well to cold winter weather provided they’re able to acclimatize to seasonal temperature changes. Birds I want to stay outdoors all winter are first put outside in the summer. All of my outdoor pens were designed so that at least one-third of the cage is surrounded on all three sides and top with exterior grade plywood. It is suggested that wooden parts be painted to facilitate cleaning.
Being a city farmer, it is important to invest a bit of time and effort into building something that is aesthetically pleasing not for the birds but for the neighbours to enjoy. I could easily just slap a few sticks together and wrap some wire around these but I don’t think I would have gotten very far with my request to keep quail in the city if I’d chosen that route. I encourage all urban farmers raising animals in the city to give due consideration to this important detail.
Note that Coturnix quail kept outdoors will not lay past autumn so if you want eggs year round, they must be kept indoors. I keep them in an aviary inside my garage. And the key to getting eggs year round is light. Mine are on a 15-17 hour photoperiod. A timer in the aviary provides lighting from an incandescent light bulb.
Incubation
Apart from being able to eat fresh eggs and have a good meal once a month, one of the most fascinating aspects of this hobby is to artificially incubate the eggs. Starting around Easter every year, eggs are collected daily and put in a cool humid spot; the basement is ideal for storing eggs. Eggs are stored pointed end down and kept for no more than seven days. The eggs are then placed in an incubator for however many days are required for the chicks to develop inside the eggs. Coturnix quail develop in 17-18 days while Bobwhite quail require 23 days. There are all sorts of incubators to choose from. The HOVA-BATOR incubator was developed over 25 years ago and is the first one I started with. This incubator is made of styrofoam. It is very susceptible to changes in room temperature so if you decide to purchase one of these, it should be located in a room where the temperature stays constant. Get one with a turbofan to increase the air circulation within.
If you ever get into breeding rare and endangered species, you will probably want to invest into something a bit more sophisticated like a Sportsman 1202, a cabinet style incubator. Both the HOVA-BATOR and the Sportsman 1202 are manufactured by GQF Manufacturing Company located in Savannah, Georgia. Artificial incubation is both an art and a science. To get good results when incubating, you need just the right combination of good quality eggs, a temperature which stays constant, good ventilation, and right moisture conditions. Be sure to read the instructions and either buy or pick up a book from the library on incubation. And, if you decide to start with a HOVA-BATOR, you should invest in an automatic turner unless you want to turn the eggs yourself daily, at least three times.
Once the eggs are ready to hatch, you need to increase the humidity so that the chicks don’t get stuck as they’re pushing out of their shell. This is done by filling the troughs in the bottom of the incubator tray with water. Three days prior to hatching, the eggs should be placed on top of the hardware cloth (wire mesh) which comes with the incubator. If a turner was used, it should be removed. The hardware cloth gives them an excellent foothold when they attempt to stand. Some people put newspaper on top of the wire which is a bad mistake as it is too slippery and leads to crippled chicks. As a matter of fact, I have even started using something called “slip grip” on top of the hardware cloth in the incubator. You can buy this at your local Canadian Tire store. It’s the same thing people use for lining the shelves in their cupboards to prevent expensive dishware from sliding off when positioned vertically. It’s completely washable and reusable. The chicks should be left in the incubator for 24 hours. During hatching, avoid opening the incubator because it causes the moisture to escape and keeping that moisture in is extremely important for a good hatch. Depending on what model you’re using, hatching can take place over a very short or somewhat longer time period. Eggs developing in the Sportsman will hatch within a few hours whereas those from a HOVA-BATOR take a whole and sometimes two days. That’s because the Sportsman is a better machine than the HOVA-BATOR. Don’t invest in a Sportsman until you’ve been doing this for a couple of years and you know that you want to stick to this for awhile. A Sportsman incubator is a huge capital investment if you’re just trying this out to see if you like it or not.
Brooders
Chicks should be placed under a brooding lamp after being removed from the incubator. Again, there are all sorts of sophisticated equipment on the market ranging in price from Rs. 1650 to Rs.15400. I use a cardboard box with a brooder light base. The boxes used are fairly large ones so that the chicks will not outgrow their accommodations too quickly. For the beginner, this is what I suggest. Get a Y-shaped electrical socket from your local hardware store as well as a brooder lamp which comes with double insulated electrical components. Screw the Y-shaped socket inside the brooder lamp base and then mount two incandescent light bulbs inside the socket. In early spring, I recommend using two 60-watt bulbs; as summer progresses, use two 40-watt bulbs. The reason for using two bulbs is so that when one burns out in the middle of the night or when you’re away at the office or something, the chicks still get heat from the other bulb. Always keep a good stock in hand and replace the burnt one as soon as possible. Also use two different aged bulbs so they don’t both burn at the same time.
One last thing about light bulbs. I use a spray can called Beauti-Tone (Home Hardware brand) enamel and paint the bulbs either red or blue. I have tried other brands but the paint never seems to dry well on the bulb and produces a burning odour after the lights have been on for awhile. Chicks kept together in a relatively confined space such as in a brooder have a tendency to peck each other, a nasty habit which can lead to deformed beaks and sometimes even death. Poultry and game bird breeders have discovered that if you use coloured light bulbs, the chicks are less prone to peck each other. The lights should be attached about 16 inches off the floor. Wood shavings are used for bedding for the first four weeks. After the chicks have been in the brooder for 10 minutes or so, check their behaviour. If you see them huddled together in one large group with each of them trying to get to the centre, which is the warmest part, then they’re too cold. Put a cover over the box leaving a space for air of course. If you see them with their beaks open panting for breadth, they’re obviously too hot. Raise the light bulbs or remove the cover if one is present. If they’re randomly distributed throughout the brooder or laying on top of the shavings in a circle surrounding the outer periphery of the brooder lamp, you’ve got the temperature just right.
Feeding these small chicks is relatively easy. I normally start them off with Turkey Starter which is medicated with Amprol to control coccidiosis. A non-medicated Turkey Starter does not exist. Actually, it’s not such a bad idea to have a medicated feed to start them off with because the first few weeks, they walk, play, and defecate in their food and water all the time. The medication prevents them from getting ill. Turkey starter crumble is too big for the small quail chicks to eat, so for the first couple of weeks, I pulverize the feed by putting two cups at a time in a food blender. The food is then placed in a dish made from the bottom of a two-litre milk carton. They’ll quickly learn where the food is if you lightly tap on the food with your finger. It’s important to teach them where the food is during the first couple of days because after three days, they’ll be scared of you and your finger and run off at the opposite end of the box whenever you come near.
To provide water, get a plastic quail base from one of the suppliers listed below. These have a narrow drinking slot to prevent the chicks from getting in and drowning. Alternatively, you may use a Petri dish or something similar and fill it full of marbles or small stones. The disadvantage in doing this is that the birds will defecate in the water which means more work for you as the water will need changing often. After about four weeks, I start introducing Purina Flight Conditioner in the food dish at a ratio of 1 part Flight Conditioner to three parts Turkey Starter. Seven days after that, I bump that up to two parts Flight Conditioner to two parts Turkey Starter so that after four weeks they’re off the medicated feed and are eating out of the same troughs used by the adults.
After the chicks have reached four weeks of age, I transfer them into a cage of the same size and dimension as that used for adults. In early spring, I move the lights to this cage also and leave them there until I start noticing that the birds no longer use them as a source of heat. At six weeks of age, you will start noticing small eggs in the bottom of the cage. Two weeks after that, the eggs are more uniform in size and you can expect one a day and in some cases, as many as 250 a year. You can start setting eggs from those birds in your incubator after the birds are about eight weeks old.
How To Feed Quail
Feeding quail is one of the most important aspects of raising quail, besides housing quail. Knowing what to feed your quail and how to feed the quail is essential for keeping your quail healthy. In this quail husbandry guide, we’ll discuss methods of feeding quail; what to feed your quail; how much to feed quail; and what constitutes healthy quail feed ingredients.
One of the most basic elements to understand regarding the practice of feeding quail is that you should not attempt to supplement mixed quail feed too heavily. Commercially mixed quail feed, available from your local poultry feed store, are carefully formulated to provide your quail with the right mix of nutrients and vitamins to keep your quail healthy. Supplementing quail feed with grains, scratch and other food items may change the amount of nutrients your quail are eating.
Before we begin teaching you how to feed quail, you need to know the reasons for which you are raising quail. Quail are fed differently depending upon their purpose. For example, quail breeds raised for meat and consumption are fed quite differently from quail that are being raised for quail breeding or quail eggs. Each type of quail require different types of feed depending largely upon their purpose to the quail farmer.
How to Feed Your Quail Based Upon the Age of the Quail:
No matter the type of quail species, feed baby quail and young quail a quail starter diet. Starter diet is essential for young baby quail because the growing birds need an extraordinary amount of protein as they grow. Starter quail feed has this, as well as other vitamins and nutrients that baby quail require. Feed baby quail the starter feed up to the age of 8 weeks.
Once your baby quail are 8 weeks old, switch what you’re feeding quail to a purpose-specific quail feed. If you are raising quail for meat, you should switch the quail to what is known as a finisher diet. This essentially helps nourish the quail until they are old enough to be killed, prepared and consumed. If you are raising quail for quail eggs or to breed quail, switch the quail feed to a developer quail food. Then, when the quail start to lay quail eggs, start feeding the quail a layer-specific quail feed.
Hatching and Brooding Quail
Start raising quail by hatching quail eggs in an incubator and brooding the baby quail. Hatching and brooding your own quail can be a fun and exciting experience. You can hatch and brood any type of quail, though one of the most common course of action is hatching and brooding Bobwhite quail.
Things You’ll Need to Brood Quail:
Fertile quail eggs (obtained from a local quail breeder); an incubator; and a brooder lamp for brooding the young quail.
Set the incubator humidity and incubator temperature to prepare the egg incubator for hatching quail eggs. Follow the instruction manual that came with the egg incubator to learn how to modify its humidity and temperature settings.
The best humidity for hatching quail eggs is 70% humidity while you are incubating the quail eggs. After the quail eggs hatch, adjust the humidity to 80%. The temperature of the incubator should be at approximately 100 degrees fahrenheit.
Set the fertile quail eggs into the egg incubator with the small end of the quail egg pointing in a downward direction. Some incubators have automated egg turning mechanisms. If you are not using a mechanical egg turner, turn the eggs by hand at 30-degree intervals.
Turning quail eggs while incubating them is important because it helps to keep the quail egg embryos from sticking and growing to the side of the fertile quail egg.
How Long Does It Take to Hatch Quail Eggs?
The length of time to hatch fertile quail eggs depends largely upon the type of quail that you are hatching. For example, fertile Bobwhite quail eggs take 24 days to hatch.
Brooding Baby Quail:
Baby quail need to be placed into a brooder to keep them warm after they hatch. In nature, the mother quail would keep the baby quail warm. If you’ve used an incubator, you must use an artifical method of heating. A standard heat lamp (100-watt) used for brooding chicks (baby chickens) is sufficient for brooding quail. Keep the temperature at 100 degrees fahrenheit and decrease the brooding temperature by five degrees every seven days.
Breeding Quail
There are various quail species to choose from when selecting a quail breed. Unlike chickens, which can be categorized into various chicken breeds, there is no such thing as quail breeds. Instead, quail can be divided into various genera. Learn the difference between different types of quail, such as the Harlequin Quai, Bobwhite Quail and the Japanese Quail, and choose for yourself what type of quail you want to raise.
- Asian Blue Quail (Coturnix chinensis): The Asian Blue Quail is popular among backyard quail raisers where it is usually referred to as the Button Quail. It is the smallest member of the quail species.
- Blue Quail (Coturnix adansonii): The Blue Quail is relatively common throughout sub-Sahara Africa.
- Brown Quail (Coturnix ypsilophora): Also known as the Swamp Quail, the Brown/Swamp Quail is very common throughout wet areas in Australia.
- Common Quail (Coturnix coturnix): The Common Quail is very common in Europe, Asia and Africa. The Common quail is a dual-purpose quail (used for quail eggs and quail meat). It is popularly hunted as a gamebird. The Common Quail eats small insects and grains/plant seeds. It takes approximately 18 days for fertile Common Quail eggs to hatch.
- Harlequin Quail (Coturnix delegorguei): The Harlequin Quail, found throughout Central America and the southwest of the United States, is also known as the Montezuma Quail, Mearns’ Quail, and the Fool’s Quail. The Harlequin/Montezuma/Mearns/Fool’s Quail is popular among gamebird hunters, where it can be found in open pastures and fields eating insects (the primary ingredient in its feed).
- Himalayan Quail (Ophrysia superciliosa): The Himalayan Quail is a rare quail genus found only in the Himalayan Mountain regions and is probably extinct.
- Japanese Quail (Coturnix japonica): The Japanese Quail is originally from Asia, though it is now raised around the world. Adult Japanese Quail measure twenty centimeters long and are very popular for domestic husbandry, used for both eggs and quail meat.
- Jungle Bush-quail (Perdicula asiatica): The Jungle Bush-quail is found throughout South Asia and is rarely raised by domestic quail hobbyists.
- Manipur Bush-quail (Perdicula manipurensis): The Manipur Bush-quail is an Indian quail species.
- New Zealand Quail (Coturnix novaezelandiae): The New Zealand Quail, also known as the koreke quail, was found throughout New Zealand before being hunted to extinction by both humans and animal predators introduced by sailors and settlers to New Zealand.
- Painted Bush-quail (Perdicula erythrorhyncha):
- Rain Quail (Coturnix coromandelica): This South Asian quail species has very distinctive color patterns on its plumage and is rarely raised by backyard quail hobbyists.
- Rock Bush-quail (Perdicula argoondah): The Rock Bush-quail is an Indian quail species that is rarely used for eggs or meat.
- Snow Mountain Quail (Anurophasis monorthonyx): The Snow Mountain Quail is a large gamebird found at high altitudes in Alpine climates and grasslands. During breeding season, the Snow Mountain Quail only lays three to four eggs.
- Stubble Quail (Coturnix pectoralis): Originally from Australia, the Stubble Quail is a gamebird quail species not commonly raised for domestic purposes.
The Bob White Quail
The best-known species in the United States is the northern bobwhite, named from the loud call of the male. A popular game bird, it was originally resident east of the Rockies and north to southern Ontario and New England; it has been successfully introduced in parts of western North America, the West Indies, and New Zealand. It is 21 to 26 cm (8.5 to 10.5 in) long, with a slight crest. Males of the northern populations are reddish brown above and white, barred with black, on the belly. The throat and a line above the eye are white; a broad black line extends from the eye backward and around the throat. This white area is replaced by buff in the otherwise similar females. In subspecies from the southwestern United States and parts of Mexico, the face, throat, and variable amounts of the rest of the underparts are black.
Monogamous, after the breeding season, bobwhites gather into coveys—groups that may number over 100 birds—dispersing during the day for feeding and reassembling at night or in adverse weather. The members of the covey seek warmth and protection by huddling in a circle, with their heads turned outward. If frightened, bobwhites (like most quail) prefer to run from danger; when flushed, they fly rapidly with a loud whirring sound, but quickly drop to earth. (The information above is from Msn Encarta)
Bobwhite Quail are generally seen in the wild in the Midwest and Southern United States as well as parts of Mexico. Bobwhite quail are small, chunky birds and usually travel on foot and stay in a limited area. Bobwhite quail are primarily seed eaters, although they do eat some insects in the wild.
Bobwhite Quail chicks are tiny- about the size of bumblebees. Bobwhite Quail, noted for its flavorful meat, has become a high-end alternative to chicken for many connoisseurs. The bobwhites probably have the largest number of calls with at least 19 distinct calls. Jumbo Wisconsin and Georgia Giant are also a variety of the bobwhite quail. Breeding of Northern Bobwhites is now a profitable business.
Bobwhite quail, especially the young chicks, are sensitive to poor feed quality. Most successful producers typically raise breeders with the intent to market the resultant chicks at one day of age to growout producers, or they specialize in the growout of day-old chicks until approximately 17 weeks of age to sell as flight-ready birds to game preserve owners.
Coccidiosis normally attacks birds at the age of 2-6 weeks and birds that are on litter or ground environment. Using a proper starter feed can help with prevention of this disease. Wet litter and buildup of droppings around waterers and feeders is a common source of overwhelming infections. Nipple waterers significantly reduce the occurrence of wet litter and are simpler to clean than trough waterers.
The two basic production facilities used for producing Bobwhite quail are referred to as flight pens and quail barns. Breeders are typically housed in one of three ways: in large community floor pens, in smaller communal cages designed for 10 to 20 birds each, or caged as pairs or trios.
My Thoughts on Raising Bob White Quail.
The Bob White Quail adapt very well to the captive environment. When it comes to raising Quail for a beginner. I would recommend raising the Bob White Quail as a possible first or second choice.
Incubation period for Bob White Quail eggs is 21 to 23 days. This Quail reaches maturity at around 16 weeks of age and should be laying eggs at 21 to 25 weeks of age. When raising the Bob White Quail in a proper environment, with the right pairing, diet and good management skills. The female is capable of laying 100 eggs or more per year.
The Medications Used In Quail Food
Most game bird food does have medication in it. The manufacturer of the feed realizes the disease factors that are involved with raising quail. So these medications are added to the food before you purchase it. The medications they will usually add are coccidiostats and/or antibiotics.
When the young quail chicks are moved to the brooder, their immune system is non-existent, so they’re very susceptible to disease. These medications that have been added are to help cut down this risk for your quail chicks.
Coccidiosis is a parasite disease that invades the quails digestive tract. This parasite disease is almost impossible to eliminate all the potential of it becoming a problem even with having the good management and cleaning habits required for raising quail successfully. This leaves only one choice of prevention. This chance is using medicated food. The medication itself is at a very low level in the food, this way you can feed it to the quail in a continuous manner. If the quail somehow still contracted the disease, it can be used at higher levels to help fight the parasite. However, I would recommend consulting a lab for instructions for the proper amount. This medication has the potential of poisoning the quail if given an excessive amount.
If raising your quail for meat purposes, stop this and all medications one week before the quail are to be slaughtered.
As your quail matures and their immune system develops, the need for the coccidiostats in the quails diet will not be needed. This doesn’t mean that your quail will no longer be susceptible to this disease. It just means it’s less likely. If any of the quails you’re raising would happen to contract the parasite, they should be removed from the flock, and either Coban or amprolium should be added to the water.
Antibiotics can also be added to some quail food. The two approved antibiotics for quail are bacitracin and penicillin. I would recommend consulting with your local feed store expert or a lab for further instructions. Adding antibiotics when raising quail can assist in many different ways, it not only helps in maintaining health, but also promotes growth when given to the quail at lower levels.
The recommended dosage of bacitracin is 50 grams per ton of food. This is the highest level permitted by the FDA. It is used to help prevent “quail disease” also known as ulcerative enteritis. If your quail contracted the disease, you may add the antibiotic to the sick quail’s drinking water. It’s not a bad idea to add this particular medication to your quails feed at all times. It will help make your raising quail experience a whole lot easier and give your birds a much healthier and productive life.
Remember, all medications have a label on them for a reason. This is to instruct you on proper use. So if you use them, follow these instructions, your quail’s lives depend on it.
Blue Scaled Quail
Scaled quail (Callipepla squamata) are a small, chunky, short-tailed, round-winged, ground-dwelling bird. Gray-brown head with white-tipped crest, Gray-brown upper wings Blue-gray about neck, upper back and chest with black scaling. Buff belly scaled with black, is chestnut on males in south Texas Gray flanks with white streaks Female has less conspicuous crest and dark brown streaks on sides of face and throat Immatures similar to female. Scaled quail, often called blue quail or cotton top, are native to the Chihuahuan desert and the surrounding grasslands of the southwestern portion of the United States and Northern Mexico.
Scaled quail can be seen in the early mornings and late afternoons feeding on sunflowers, cactus, green vegetation, and a variety of other plants and seasonal seeds. Scaled quail have a very high natural mortality rate and are short lived. Generally seed eaters, scaled quail usually feed in the early morning and late evening. The scaled quail is a runner, able to reach speeds above 15 miles per hour. Despite being a bird of the desert, the Scaled Quail heavily relies on water. Come early March, scaled quail start thinking about reproduction.
Raising Blue Scaled Quail
Scaled Quail are nervous birds by nature and will do best in an aviary that has more length than width. These quail also feeds on insects such as beetles and grasshoppers. Generally, Blue Scale quail are very good layers. From the time the birds are taken to the brooder house, a preventative dosage of BMD (Bacitracin) can be added in the drinking water about every two or three weeks to prevent Quail Enteritis.
They are winter hardy, provided you can place several birds in one aviary for them to form a natural covey. These birds are 11 inches long on average and weigh between five and seven ounces. One end of the pen can be boxed in with an opening for the birds to enter this area and a lift-up lid so eggs can be gathered. Most of the birds have paired up by the first of April.
Widespread and common throughout its range, the Scaled Quail is evaluated as Least Concern on the IUCN Red List of Threatened Species.
The Button Quail
Button quail are easy keepers and prolific breeders, if their basic requirements are met. These little Quail are the most charming little game birds, and well suited to almost any bird collection.
Today, the Button Quail buyer now has more than 15 different color varieties to choose from. Here is a list of some of the different varieties:
- The Blueface
- The Cinnamon
- The Fawn
- The Golden Pearl
- The Redbreasted
- The Silver
- The Splashed-Button
- The White Button. This variety should be solid white with no other coloring.
Button Quail can sometimes be found in pet stores. I would be very careful about purchasing these Quail. Ask for records of where they came from, if they have no records, I would not purchase them. Purchasing Button Quail from a pet store could result in Quail that are highly inbred. I would recommend purchasing them from a Button Quail breeder.
Since Button Quail are so small and cute, some people will purchase them to raise in their homes as pets. Even though these little quail can be quite hyper and will need a couple of hiding places because buttons are easily scared. With proper care, time and effort they can become very tame and make great little pets.
The miniature button quail can also be kept in fish tanks. Because button quail are quite active, it is not uncommon for them to track through their droppings. So you should keep some type of slip proof covering or litter on the floor. Something that is easy to maintain.
Buttons also need grit and minerals like many birds to help their digestion and stay healthy.
Button quail can be scrappy amongst themselves. You will have to keep a close eye on this, because the picking can result in injury or death. Providing hiding places in their cages can help prevent this situation. If picking would become a problem separation or debeaking may be required.
One important thing to keep in mind, when keeping Button Quail in your home as pets. The Button Quail life span is normally 4 to 5 years. This life span can be reduced quite dramatically if you don’t follow a couple rules.
- When raising Quail, two things have to come together for them to lay eggs. If they are receiving proper food and care.
- The amount of light hours they receive per day.
- The right temperature.
So if you are raising the Button Quail in your home, they are going to receive this right combination all year round. If not addressed your females will then lay eggs all year. Laying eggs does take a lot out of them. So my advice would be to give them atleast a 3 month break per year.
You do this by cutting down on the amount of light they receive. This is best done as a gradual process. You are the only one who really knows the combination of daylight hours and electric light hours that are accumulated in your home.
Whatever this amount may be, you will need to gradually reduce the amount your Quail are receiving by covering them.
Systematically reduce the hours of light they are receiving on a daily basis, until they are down to no more than 8 hours per day. Then keep them at that amount of light for at least 3 months for rejuvenation. Once the 3 month rest period is over, just reverse the process. Doing this will help their productivity and help them live a full life. If you never want them laying eggs, just cover them after 8 hours of light everyday.
When raising Button Quail for reproduction, it is possible that they would hatch their own eggs. This would depend on the proper type of housing and nesting area provided. But I believe most breeders will incubate.
When pairing your breeders to reproduce. There are just some variables that have to come together that you can’t see. Things like compatible and fertile breeders. Their diet is also very important. This is the one thing you do have complete control over. So make sure your breeder Button Quail are receiving a proper breeder diet.
If you do use an incubator, make sure to follow all proper incubation procedures. Button Quail should hatch in about 16 days, however you can wait until day 22, by then they would have hatched if they were going to.
Button quail are about the size of a large Easter chicken chick at adult size.
The California Valley Quail
The California Quail, Callipepla californica, also known as the California Valley Quail or Valley Quail, is a small ground-dwelling bird in the New World quail family. It is the state bird of California
These birds have a curving crest or “plume” that droops forward – black in males and brown for females; the flanks are brown with white streaks. Males have a dark brown cap and a black face with a brown back, a grey-blue chest and a light brown belly. Females and immature birds are mainly grey-brown with a light-colored belly. Their closest relative is Gambel’s Quail which has a more southernly distribution and a scalier appearance. The two species separated about 1-2 mya ago, during the Late Pliocene or Early Pleistocene(Zink & Blackwell, 1998).
The California Quail is a highly sociable bird that often gathers in small flocks known as “coveys”, and one of the daily communal activities is the taking of dust baths. A family of quail will select an area where the ground has been newly turned or is soft, and using their underbellies, will burrow downward into the soil some 1-2 inches. They then wriggle about in the indentations they have created, flapping their wings and ruffling their feathers, causing dust to rise in the air. They seem to prefer sunny places in which to create these dust baths, and an ornithologist is able to detect the presence of quail in an area by spotting the circular indentations left behind in the soft dirt, some 3-6″ (7-15 cm) in diameter.
They are all-year residents. Although this bird coexists well at the edges of urban areas, it is declining in some areas as human populations increase. They were originally found mainly in the southwestern United States but they have been introduced into other areas including British ColumbiaHawaii, Chile, New Zealand, and to Norfolk Island and King Island in Australia
These birds forage on the ground, often scratching at the soil. They can sometimes be seen feeding at the sides of roads. Their diet consists mainly of seeds and leaves, but they also eat some berries and insects. If startled, these birds explode into short fast flight. Given a choice, they will normally make their escape on foot.
Their breeding habitat is shrubby areas and open woodlands in western North America. The nest is a shallow scrape lined with vegetation located on the ground under a shrub or other cover. The female usually lays around 12 eggs. Once they are hatched, both parents look after the young.
My Thoughts on Raising California Valley Quail.
The Valley Quail do better on the ground than on wire, due to their nervous nature. The ground however should be dry so a drier climate would work best. There are a lot of breeders that do raise these quail on wire, with success. I would recommend giving them a little more room than you would a Bob White or Coturnix. It is also a good idea, when raising these quail to start them off by adding an antibiotic to their water. Due to their nervous nature the valley quail can become stressed rather easily. When they even after they reach maturity and you notice they seem stressed, it is a good idea to add some antibiotic to their water. This actually holds true when raising any type of quail.
This Quail will actively breed in captivity, their natural laying season is May through June. Also remember to follow the general rule when raising quail, to not add new quail to the an existing flock during breeding season. The new quail would be killed quickly. Only add new quail to an existing flock in winter or colder months of the year. Incubation time 22 to 23 days using the same settings as for the Bob White Quail. Find all incubation temperature and humidity settings in the beginners guide.
Raising Coturnix Quail
Japanese Quail also known as Coturnix Quail
Raising Coturnix or Japanese quail can be a delight, their space requirements are small, they don’t eat a lot, convert feed into protein efficiently, and are much more friendly creatures than even the sociable chicken. The Coturnix Quail:incubation period is 17 days, forced air incubators temperature 99º to 100ºF with a humidity level of 60%. The Coturnix Quail mature in six weeks with a average weight of 5-6 oz. The Coturnix Quail will began laying eggs at seven weeks old and reach a slaughter weight of 7-8 oz.
When scared, quail tend to fly straight up and can gain enough speed to break their necks when they hit the top of the cage. Remember that raccoons are very good at invading pens to kill and eat your birds and eggs. So when raising quail you must design and make you cages or coops predator safe. Special care must be taken to protect the quail from cold drafts, food and water shortage, and dampness. These type of conditions can cause your birds to become stresses and piling could occur. You will find your chicks in a large piles dying. It is a natural reaction and can cost a quail breeder a lot of birds.
During the brooding process of raising these quail change the paper and clean the wire daily for best success. Keep the quail in the brooder until fully feathered and reduce heat by 5 degrees weekly. . Continue to protect quail chicks from draft and food/water shortages, and feed starter until week six. After the quail are fully feathered they can be sexed and moved to their final cage. Reducing height will eliminate broken necks in the quail.
Like most birds, Coturnix like to take dust baths in hot weather. The Coturnix Quail eggs should be gathered daily, in hot weather as much as 2 to 3 times per day, to assure freshness. The coturnix appears to be susceptible to most of the diseases that affect domestic poultry and, therefore, raise your Coturnix quail separate from chickens and turkeys.
Eggs when gathered are kept at controlled temperature turned twice daily. When you encounter quail eggs in a restaurant, this is the bird usually responsible. If you are going to keep your own eggs to hatch for replacement birds, it is a good idea to get a few males from another source so that inbreeding does not occur. Raising you quail on wire above the ground will make it less likely that the quail will be standing in manure and this will also help the eggs remain clean.
The Adult Male Coturnix weighs about 100 to 140 grams (3 1/2 to 5 ounces). The male birds can be identified readily by the rusty brown colored feathers on the upper throat and lower breast region. Males also have a cloacal gland, a bulbous structure located at the upper edge of the vent which secretes a white, foamy material. This unique gland can be used to assess the reproductive fitness of the males (Cheng, Hickman and McIntyre (1985). The young birds begin to crow at 5 to 6 weeks old. Sanford (19 57) described the voice of the male as a loud, castanet-like crow, producing sound as “pick-per awick” or “ko-turro-neex”. During the height of the normal breeding season, coturnix males will crow throughout the night.
The Adult Female: Coturnix are slightly heavier than the male, weighing from 120 to 160 grams (4 to 5 1/2 ounces). The body coloration of the female bird is similar to the male except that the feathers on the throat and upper breast are long, pointed, an d much lighter cinnamon. Also, the light tan breast feathers are characteristically black-stippled.
Thoughts on Raising Coturnix Quail
When raising Quail for meat or eggs. The Coturnix Quail would get my highest recommendation. The Coturnix Quail adapts very well to the captive environment. These quail are as close to being a domestic breed as you will find in Quail.
If you are looking to start a Quail raising business for meat or eggs and want a quick turn around. The the Coturnix Quail would be the right choice. The Coturnix Quail matures in about 6 weeks and should be laying eggs at 8 weeks of age.
When raising the Coturnix Quail in the proper environment and by using artificial lighting and regulated temperatures as discussed in “The Beginner’s Guide”. It is possible for the female of this specie to lay between 200 and 300 eggs per year.
The Coturnix specie also offers two genetically altered breeds that are good quail to raise for Meat
The Jumbo Brown which can dress out at up to sixteen ounces and lays much bigger eggs for consumption than any of the Coturnix. These quail are over twice the size of the original Coturnix specie.
There is also the Texas A & M or White Coturnix which was genetically altered to be the perfect white meat quail for eating. This quail is not quite as big as the Jumbo Brown however, is also bigger than the regular Coturnix. They will usually dress out around 10 ounces, which is still just about twice the size of the satndard of the specie.
I wouldn’t hesitate offering my highest recommendation to raising either one of these big coturnix quail for meat.
The Gambel Quail
The Gambel’s Quail, Callipepla gambelii, is a small ground-dwelling bird in the New World quail family. It inhabits the desert regions of Arizona, California, Colorado, New Mexico, Nevada, Utah, Texas, and Sonora. The Gambel’s quail is named in honor of William Gambel, a 19th century naturalist and explorer of the Southwestern United States.
These birds are easily recognized by their top knots and scaly plumage on their undersides. Gambel’s quail have gray plumage on much of their bodies, and males have copper feathers on the top of their heads, black faces, and white stripes above their eyes. Gambel’s quail can be commonly confused with California Quail due to similar plumage. They can usually be distinguished by range, but when this does not suffice, California quail have a more scaly appearance and the black patch on the lower breast of the male Gambel’s Quail is absent in the California Quail. The two species are sister taxa which diverged during the Late Pliocene or Early Pleistocene, 1 to 2 mya (Zink & Blackwell, 1998).
The bird’s average length is 11 inches (30 cm) with a wingspan of 14-16 inches (35-40 cm). Its diet consists primarily of plant matter and seeds. Gambel’s quail primarily move about by walking, and can move surprisingly fast through brush and undergrowth. They are a non-migratory species and are rarely seen in flight. Any flight is usually short and explosive, with many rapid wingbeats followed by a slow glide to the ground. These birds have relatively short, rounded wings and long, featherless legs.
In the late summer, fall and winter, the adults and immature young congregate into coveys of many birds. In the spring, Gambel’s quail pair off for mating and become very aggressive toward other pairs.The chicks are decidedly more insectivorous than adults, gradually consuming more plant matter as they mature. Gambel’s quail are monogamous, and rarely breed in colonies. The female typically lays 10-15 eggs in a simple scrape concealed in vegetation, often at the base of a rock or tree. Incubation lasts from 21-24 days, usually performed by the female and rarely by the male. The chicks are precocial, leaving the nest with their parents within hours of hatching.
Gambel’s quail are quite easily Arizona’s most popular gamebird. Gambel’s quail eats leaves, seeds, fruits and small insects in the wild. Gambel’s quail breed only in spring and early summer, and breeding intensity and success are directly related to the amount of rainfall received during the previous October through March. In the spring, Gambel’s quail pair off for mating and become very aggressive toward other pairs.
Gambel’s quail are the evolutionary answer to the question: “Can quail survive in the desert.
My Thoughts on Raising Gambel Quail.
The Gambel Quail are better raised on the ground with good management practice provided by the quail farmer. They are very nervous, very active and can become very aggressive during the mating season. During the breeding season these birds seem to do better being paired 1 male to 1 female.
Due to their active nature the pens should be more long than wide. Give them enough room to run.
The Texas A&M Quail
The The Texas A&M or White Coturnix Quail is a genetically altered bird from the Corturnix specie. This quail was created to be the perfect quail for consumption.
This white quail is some what larger than the regular Coturnix quail it is more the size of the Pharoh Coturnix. You can get between 8 to 10 ounces of white meat out of the Texas A&M quail.
Because of the Texas A&M quail’s quick incubation period and quick maturity rate, they are a great quail for breeder’s to raise for meat purposes.
When raising the White Cotunix quail you just use the same rules as you would for any Japenese quail. The incubation period and maturity rate is the same.
This bird is generally never raised for hunting because they don’t fly very well.
Coturnix Quail Tips
When we talk about adult Coturnix Quail they will be over six weeks of age, although they still have a little more growing to do until you see any eggs. Providing they have had good management Coturnix Quail lay eggs from around seven weeks of age, you should get an egg most days during the summer.
To start with the eggs can be super size with double yolks, or very small almost pea sized (see photo below), after a couple of weeks they usually will lay regular sized eggs.
If laying hens are moved to new quarters, a pause in production is likely. Avoid introducing new birds into the territory of an established group
Yembroos® tips for – Hatching coturnix quail eggs Successfully
The biggest mistake people make with hatching quail eggs is to add to much water to the machine, humidity is a big issue but I would strongly suggest adding no water at anytime during incubation. I certainly don’t and have favourable results.
The next consideration in incubation is Temperature, for a still air machine you need to have the thermometer level with the top of the eggs and set the temperature at 38.5c – 39c (101.3f -102.2f), for a machine with a fan that circulates the air, it is a good idea to keep the thermometer level with the eggs and set at 38c (100.4f) Check these temperatures at least twice a day, but try not to be constantly adjusting the temperature once the eggs are in. Run the machine for several days beforehand.
Let the eggs get to room temperature (approx 20c) and stand for a few hours before placing them in the incubator.
Turn the eggs regularly, at least 3 times a day (morning, afternoon and late evening is best) if you have an automatic turning machine, remember to make sure it is working! You should not turn the eggs after day 15.
You can check the fertility after 6 days, using a candling lamp the Embrio should be red and clearly visible, if you are not sure leave the eggs in the machine you can test again later, by day 14 light will not pass through if the eggs are fertile, be careful not to overheat the eggs whilst testing them and remember if they are fertile it doesn’t mean they will all make it out of the shell.
If you have had the correct temperature, the eggs should pip late on day 16 and hatch on day 17.
From day 15 it is important not to open the incubator, (no matter how tempting it is) until the eggs have hatched and the baby chicks have dried out and are fluffy. This is because they need the humidity generated by themselves to aid hatching, once you have opened the lid they will run, so depending on your incubator it can be a good idea, (when they are all ready to take out) to stand it in a tray with 100mm sides. The chicks can stay in the incubator for up to 12 hours after the first one is out of the shell.
Always make sure you clean the machine thoroughly after each hatch.
Tips for Raising Quail Birds
On a small scale for the first 5 weeks you can use a cardboard box with a light bulb for heat, if you are using this method there are a few things you can do for your own safety and the health of the chicks.
I suggest a box about 70cm square, with corrugated cardboard neatly covering the floor, or use wood chips (not sawdust), a slippery surface will make the chick a cripple. Hang a bulb securely initially at a height of 50mm from the floor of the box.
Providing the correct heat requires careful monitoring, if the chicks are too cold they will be huddled under the lamp, too hot and they will be as far away as they can get from the heat, if they are evenly spread in the box you are not far wrong. You can alter the heat in 3 ways, 1) Altering the bulb wattage 2) Adjusting the height of the bulb in the box 3) Partly covering the top of the box
The food and water can be placed about 15 -20 cm from the lamp, you can move it further away in the box after the first few days.
For the first 4-5 weeks I feed chick starter crumbs, there is a special quail starter or game starter crumb available, but with Coturnix quail chick crumbs are fine. After 5 weeks I use poultry layers mash, quail breeder pellets are also available.
I find that drowning can be a problem so be sure to use a shallow drinker.
After a week you should think about placing wire netting over the top of the open box, the quails will fly out soon!
You can gradually reduce the heat, at 4-5 weeks they should not need any unless it is particularly cold, ideally the box should be in a warm, draft free room or building.
Quail Breeding
The Breeding Stock
There are generally two main methods of breeding that are normally practiced in quail breeding.
One is when you have mixed sex quails in a cage/ housing. The male-female rate should be 1:2.5 which means 4 quail cockerels to 10 quail hens. If you breed quails on a larger scale or don’t have the time necessary to spend on the other method this is the one you want to go for. This method has some disadvantages as well, like frequent fights between the males, which causes general nervousness in the cage and the fertilization and egg laying rate can become irregular.
The other method is to keep the individual males and females separately and place the cockerels into the hen’s cages periodically to do their job. This way you will achieve high fertility rate and the breeding quality can also be well monitored. It’s a good practice on a small scale breeding, especially when you want to go for breeds like a Chinese Painted quail where with this method you have better control over the required colours and patterns of the quails that you wish for. The only disadvantage of this method is that is time consuming.
The Incubating
The domesticated quail has lost the instinct of nesting so pretty much the only way of breeding quail is in an incubator. An alternative choice is to place the eggs under a broody hen (ideally Bantam) for hatching. If you choose this option you will need to remove any other egg types from under the broody hen though.
Collect the eggs 3-5 times a day to reduce infection rate. Select healthy looking eggs with strong looking shell, inspect them thoroughly looking for any cracks or other damage. Do NOT wash the quail eggs, this will remove their porous protective coating and they’ll become vulnerable against bacterial infections. It’s also advisable to perform a candling check. This will show you any possible cracks, the health of the yolks and the size of the airspace. If you get an egg candler make sure you get the high intensity one because the standard candler will not shine through the dark shell of the quail egg.
Store the quail eggs in a dry, cool place on egg trays with fat end up. The storing temperature should be between 12 – 17 degrees Celsius and the relative humidity around 70 – 80 percent. Be careful, if the temperature rises above 18°C the development of the little embryos can begin and your hatching quail eggs become useless. Do NOT store hatching quail eggs in the fridge, its too cold for them. Some say that you can use quail eggs up to 10 days old for incubating but we would not recommend using quail eggs older than 7 days.
The eggs should be fumigated after collection but some breeders do the fumigation when the quail eggs are placed in the incubator for hatching. If you choose the second option, the fumigation must be done within the first 12 hours of incubation. For fumigation use 25g of Potassium Permanganate and 35ml of Formalin (40%) for each cubic metre of incubator space. The method is like this: Place the Potassium Permanganate in an enamelled or ceramic large diameter but low walled dish (like an oven pan or large fry pan, or cake plate or similar), then add the Formalin. Do not breathe in the Formalin, it’s best to use a suitable respirator. Place the dish into your incubator. the temperature should be set between 20-30°C and the relative humidity between 80-90%. If you have a forced air incubator have the fan running but block the vents for 20 minutes, then open to remove the container and vent. For still air incubators keep it running for 20 minutes then open to remove the container and vent.
The room where you set your incubator up should be of a steady constant temperature. The incubator must be clean and disinfected. Make sure you run the incubator for about a day with correctly set temperature and humidity before you place the quail eggs inside.
At the end of the day it is your choice what kind of incubator you will use but we recommend using a fan assisted incubator with automatic turning facility. If you get a decent fan assisted incubator you will not have any cold spots, with automatic turning facility you won’t forget to turn the eggs, so you’re half way there to achieve a successful hatching rate. If your incubator is not equipped with an automatic egg turning system turn the eggs manually 3-4 times a day. Egg turning is very important to keep the little chick embryos in the middle of the egg and prevent them from sticking to the inside of the shell. There are only two major other things you have to watch out for, and that is to maintain the correct temperature which in the case of the quail is 37.8°C and the humidity level of 45-55%. Even if you have a fully automatic digitally controlled incubator it’s recommended to place an extra temperature and humidity meter into the incubator in the way that you can check the values through the viewing window just to make sure that your incubator is not letting you down. The correct temperature level is very important. Under-incubating (temperature too low) will result in late hatching and over-incubating (temperature too high) will result in early hatching. None of them is good, you will loose a lot of quail chicks if it happens. That’s it for the first 7 days. On the 7th day you can perform a n egg candling to see how many eggs are fertile. At this stage you should already recognize the quail embryo inside the egg. Remove any “empty” quail eggs to prevent the transfer of infections onto the healthy eggs and carry on incubating for another 7 days. On the 14th day stop the turning mechanism or if you’ve been turning the eggs manually stop the turning. At this stage raise the humidity level to 80-85%. This will soften the shell and help the little quail chicks getting out easier. If your incubator has a separate hatching tray then put your quail eggs on the hatching tray. Japanese Quail chicks will begin to hatch from the 16th day of incubation, but most of them should hatch on the 17th day. Any quail chicks that hatch after the 18th day will probably die. If you achieve 75% of hatching rate or above, you’ve done very well.
Very important is that you let the quail chicks come out on their own and don’t help them by any means. If they need help they are not strong enough to live anyway and will die within a day or two.
Keep the chicks in the incubator until they become dry and fluffy, then place them into the pre-heated brooder. Don’t rush this or they will catch a cold and die. The quail chick can be left in the incubator for up to 24 hours (some say even 48 hrs) after hatching.
Brooding and Care of Japanese Quail
You may think that now, that we have our quail chicks hatched our job is over but it’s actually just beginning.
The Brooder
It’s very important that you build your brooder to a suitable size according the number of the quail chicks that you will put into it. The chicks will have to have enough space to be able to walk away from the heater lamp if they want to cool down a bit. Also bear in mind that the quail chicks will multiply their size significantly by the time the reach 3-4 weeks of their age, get fully feathered and can be placed into their permanent homes.
Make sure you have the brooder built and ready for hatching time and placed in a draught free area. Also make sure that no predators can get to the chicks. Place about 2”-4” of bedding (we use fine wood shavings) and for the first week cover it with paper or even better, with some textile, like an old heavy curtain or a bed sheet. If you will be using paper as a cover make sure it’s a rough and soft type of paper because the chicks will straddle on hard, smooth surfaces like a cardboard. It’s important to tack the sides in well, making it tight and secure to prevent the quail chicks from getting stuck in the gap or even worse, to get under the cover. On hatching day turn the heater lamp on well before you place the chicks into the brooder to make sure that the bedding and the walls are nice and warm for them. For the first week use super fine crumb feed since due to their size, the quail chicks won’t be able to cope with standard size crumb feed. The feed should be sprinkled on the floor so they can easily find it. Place a feeder in as well to show them where the feed should be. The drinker should be placed away from the heat source to keep the water cool. Make sure that you use a suitable drinker. If the drinking area is too deep place a piece of electrical wire or some pebbles or anything suitable for your type of drinker to prevent young quail chicks from drowning (They can drown in 3/4” deep water or less). Some breeders use standard light bulbs as heaters, we use commercial poultry heat lamps. Place the heat lamp about 12” high from the chicks but ultimately follow the instruction of the manufacturer for fire safety reasons. The heat level should be 35°C measured at chick level for the first week then reduce the heat level by 3.5°C a week until the chicks are ready to move to their permanent place. After the first week you can remove the bedding cover and the protection from drowning if you feel that is safe to do so. You can measure the heat level but the quail chicks will “tell” you how they feel anyway. If the chicks feel cold they will gather as near the heat as they can. When they settle just outside the centre of the heat, you know that the temperature is right for them. Reducing the heat will depend on what type of a heater you use but in case of a heat lamp there are generally two ways. One is to keep lifting the heat lamp by a bit each time. The other is to start off with say a 250W bulb, then change it to a 100W bulb, then a 60W bulb. This is normally the way that breeders using standard light bulbs operate but they have a permanently fixed light closer to the chicks at the first place and start off with a 100W standard light bulb, then reducing the size every week. We prefer the heat lamps and our argument is that to our opinion the chicks need to get used to day and night conditions which is taken from them by a constant light. This is especially important if you want to breed good quality layers but the constant and strong light will cause aggressive behaviour as well. Apart from the above mentioned things all you have to do is to make sure that your quail chicks have constant access to feed and cool water.
In four weeks time your quail chicks are feathered and ready to leave the brooder and move into their new homes. You can read about keeping adult quail by clicking here or navigate to the “Quail Keeping” page from the main menu.
Quail Keeping
We write the following quail keeping guidelines for the attention of hobby quail keepers or small scale quail keepers who keep quail to provide eggs and/or meat for their family or just as game birds. The quail originates from a wild environment just as any other domesticated animal and it is related to chicken. We should try to give them back at least a little bit of what we have taken from them regarding their lifestyle. They can obviously not take care of themselves locked up so the very minimum that we should provide for the quail is food, water and a healthy environment. The quail’s lifestyle is similar to chicken’s. The quail likes warm weather conditions and they’re (the majority) migratory birds in the wild. If we have the facilities, it’s a good practice to have a winter and a summer place for the quails and move them twice a year. The quails will find this very exciting and this stimulation will even encourage nesting. For their winter accommodation we should move the quails to a light, dry, ventilated but not draughty place. Heating is not necessary unless temperatures fall under -5˚c. In the summer is best to keep the quail outside but again, the they must have access to a dry, drought free place and shade. Obviously you will have to make sure that your enclosure or aviary is safe that no predator can get to your quails. Don’t worry if you can’t provide your quails separate summer and winter place, they will feel just fine at a permanent place if you make that comfortable enough for them.
Keeping quail in cages
As to the quail cage, a quail requires a minimum of ½ sqft of floor space. There are not many specific quail cages around to buy, we make our own design for our layers and breeding stock. Due to growing interest from our customers these cages are now available to buy for the general public as well. Your other choice is to build one yourself. Some quail keepers use a rabbit hatch for keeping their quail in but you have to realise that while the rabbit likes shady dark environment the quail needs much more light to feel good, so the rabbit hutch is not the best choice to use as a quail cage. The floor area of our purpose built quail cage is 6 sqft/tier. This allows you to keep up to12 Japanese (coturnix) quails per tier. On a hobby scale, if you want to give the most possible comfort for your quails, than you put 5 quails into a cage of this size. For egg production this would be 4 hens and 1 cock quail. The “furnishing” of the quail cage should be as follows:
- Litter/Bedding – We believe the most practical bedding for quails is fine wood shavings. The quail loves to take a dust bath which they do in the wood shavings but if you really want to please them put some dry sand into a suitable tray or container, they’ll love it.
- Feeder – the quail feeder can be a small pet bowl, small chicken feeder or a through feeder. If you will use bawl for feeding you should put at least 2 in the cage and in the case of using a through feeder a small 250-300mm (10”-12”) feeder would be sufficient. It’s also practical to place the feeder outside of the cage to save more space for the quail and to prevent the feed contamination by the quails messing on it. You can get feeders that you hang onto the wire mesh of the cage. Hang it from the outside of the cage and make cut outs on the mesh to allow the quail to push their heads through to get to it (width-1 ½”, height-2”). The pet bowl is the least practical solution for hygienic reasons. If you want to place the feed inside the cage use a chicken feeder or a through feeder.
- Drinker – again, the quail drinker can be a small pet bowl, small chicken drinker or if you want to keep the water cleaner, you can do the same as with the feeder, get one that hangs onto the wire mesh from the outside. Obviously make some cut outs as described in the feeder section above.
Make sure that your quails have always dry litter and access to feed and drink at all times.
Another important condition for good quail egg production is to provide the quails with enough light. A layer quail needs 14 hours of light per day for optimal egg production. If you keep your quails in a place where there is enough natural light you will have no problems during the summer period but if you want the quails to keep laying eggs in the winter period as well, you will need to fit a light near the cage to make up for the short daylight. The light doesn’t have to be strong, an energy saving light bulb would do. The same applies if you keep your quails in a dark place like a garage without windows, dark stable, etc. The best practice is to plug in an automatic timer switch for the light, this way you won’t forget to turn it on and off on time.
Warning: DON’T use strong light! If you keep more quail cocks than one in a same cage strong light will make them aggressive and they will start to fight with each other.
Minerals Required for Japanese Quails
Besides protein, carbohydrates, fats, and vitamins, many other elements form a part of the quail’s nutritional requirements. Minerals can be divided into macrominerals and microminerals. Macrominerals are required in large amounts, and are often struct ured parts or acid-base elements. These are: calcium, phosphorus, potassium, magnesium, sulfur and salt (NaCl). The microminerals are associated in activation or integrated parts of enzymes. These include: cobalt, copper, iodine, iron, manganese, selenium and zinc. Minerals make up 3 to 5% of the quail’s body. Since minerals cannot be synthesized, they must be provided by the diet.
Calcium and phosphorus. The main function of these two minerals is in the make-up of the bones of the body. Calcium is also essential for the deposition of egg shell. It is not only that calcium and phosphorus are required in sufficient quantity but also in the correct proportions. For the young growing quail the ratio should be 1:1 to 2:1. The young quail needs a minimum of 0.8 per cent of the diet as calcium and 0.45 per cent as available phosphorus, whilst the laying quail needs about 2.5% to 3% of calcium since this is the main constituent of the egg shell.
Yembroos® observed no difference in body weight or bone ash of quail up to 6 weeks of age as long as the diets contained 0.58% to 1.18% total phosphorus and 0.44% to 2.3% calcium. Lee and Shim (1971) found that 0.5% calcium was adequate for the growing quail and a level of 4.9% calcium retarded growth. HAF observed that growing as well as laying quail were in positive calcium balance as long as the diets contained 0.8%, 1.5%, 2.6% or 3.5% calcium. A level of 3.5% dietary calcium reduced hatchability.
Minerals are present in many of the ingredients in the diet. Fish meal, meat and bone meal, milk products are good supplemental sources of calcium and phosphorus. Oystershell, limestone, tricalcium phosphate or calcium carbonate are usually added to the feed to supplement these elements.
Magnesium. Magnesium is an essential constituent of tissues and body fluids. Its ions serve as activators of important enzymes involved in intermediary metabolism. When it is absent from the diets, quails grow slowly, exhibit convulsions and may eventually die. Deficiencies in laying rations produce a rapid drop in egg production. The magnesium requirement was recommended to be 300 mg/kg diet. In our research, magnesium requirement for survival and growth was met by supple menting 150 mg magnesium per kg diet, or 50 mg magnesium per liter drinking water. We found no detrimental effects from feeding 1,000 mg magnesium per kg purified diet.
Natural feedstuffs contain adequate amount of magnesium. Some limestone (the dolomites) contain a high percentage of magnesium and are to be avoided because excess magnesium is laxative and interferes with calcium usage.
Manganese. The main function of manganese is to prevent perosis, a condition where the Achilles’s tendon slips off its groove behind the hock joint, pulling sideways and backwards. It is also required for normal growth, egg shell deposition, egg production and good hatchability. It is supplemented in the diet in the form of manganese sulphate.
Iron, Copper and Cobalt. These trace elements are essential for the formation of haemoglobin. Nutritional anemia occurs when there are deficiencies of these minerals. The red blood cells contain iron. Copper is necessary for iron utilization when haemoglobin is formed. Harl and et al. (1973) reported the iron requirement of growing Japanese quail as 90-120 mg/kg, and of copper as 5 mg/kg diet based on EDTA extracted isolated soybean protein.
Cobalt is the integrated part of vitamin B12 which involves in haemoglobin formation. The amount of these elements in the diet is quite specific; excesses may be toxic. Usually, only small amounts are added in the feed. We studied the effect of supplementary 50, 100, 250 and 500 mg cobalt sulphate per kg diet on vitamin B12 concentration in liver and caeca. The concentration was highest with 1200 mg cobalt sulphate/kg diet.
Selenium. Selenium is an essential element for growing quail even in presence of vitamin E. Diets consisting of amino acids and 100 mg d-alpha-tocopheryl acetate/kg needed to be supplemented with 0.1 mg selenium as selenite for proper survival of quail.
Impaired reproduction was observed in Japanese quail fed a diet low in selenium and vitamin E from hatching to maturity. Oviposition rate and fertility were not affected, but the hatchability of fertile eggs, viability of male and female adults and newly hatched chicks were reduced. Dietary supplementation with either 1 mg selenium or 30 I.U. vitamin E/kg diet prevented the impaired reproduction. Selenium supplementation of the diet at 0.2 mg/kg diet prevented nutritional pancreatic atrophy and resulted in significant elevation in SeGSHpx activity.
Zinc. Japanese quail are quite sensitive to a dietary deficiency of zinc. Zinc deficiency in quail chicks was characterized by slow growth, abnormal feathering, labored respiration and an in coordinated gait, low tibia ash, and a low concentration of zinc in liver and tibias. The zinc requirement for normal growth, feathering, tibia length and conformation was 25 mg/kg diet. HAF studied the protective effect of a high prior zinc intake for rapidly growing quail to a subsequently fed low zinc diet. The birds fed an initial level of 75 mg zinc/kg grew significantly better than those fed initially 25 mg zinc/kg. Bone might store zinc and it might be mobilized during zinc deprivation. A reduction in zinc absorption in adult quail by high levels of calcium.
Salt (Sodium chloride). This is needed for protein digestion and these elements are also involved with acid-base equilibrium in the body. The growing Japanese quail fed a purified type of diet containing 0.042-0.051% sodium had poor growth , high mortality, adrenal enlargement, elevated haematocrit, and depressed plasma sodium suggestive of an aberration in fluid and electrolyte haemostasis. A dietary sodium level of 0.1% overcame these difficulties.
Natural feedstuffs usually require supplemental feeding of salt (NaCl) to satisfy the quail’s requirement for sodium and chloride and this is normally added to the feed at amounts of 0.25 to 0.35 per cent. Too much salt produces a laxative effect and results in wet droppings and also wet litter.
Quail Starter Feed
Crude Protein, min | 27.0% |
Lysine, min | 1.55% |
Methionine, min | 0.6% |
Crude Fat, min | 2.5% |
Crude Fiber, max | 5.0% |
Calcium (Ca), min | 1.0% |
Quail Starter Feed
Full Life Cycle Feeding Program
Product | Quail for Meat | Quail for Release |
Quail Starter | Hatch through 5 weeks | Hatch through 8 weeks |
Quail Grower | 6 weeks of age to market | |
Game Bird Flight Feed (Multi Species) | 9 weeks until release | |
Game Bird Breeder (Multi Species) | 1 month before, continuing through the |
Quail Starter Feed
Moisture % | 12 |
Metabolizable Energy Kcal/lb | 1232 |
Crude Protein % | 32 |
Crude Fat % | 2 |
Manganese mg/lb | 25 |
Selenium mg/lb | 0.023 |
Quail Grower Feed {for Gaming}
Moisture % | 12 |
Metabolizable Energy Kcal/lb | 1281 |
Crude Protein % | 28 |
Crude Fat % | 3 |
Agrinine % | 2.09 |
Methionine % | 0.60 |
Quail Grower Feed {for Gaming}
Moisture % | 12 |
Metabolizable Energy Kcal/lb | 1303 |
Crude Protein % | 26 |
Crude Fat % | 3 |
Folic Acid mg/lb | 0.50 |
Pyridoxine mg/lb | 1.50 |
Quail Finisher Feed {for Gaming}
Moisture % | 12 |
Metabolizable Energy Kcal/lb | 1327 |
Crude Protein % | 24 |
Crude Fat % | 3 |
Niacin mg/lb | 17.50 |
Biotin mg/lb | 0.025 |
Pantothenic Acid mg/lb | 7.50 |
Quail Breeder Feed {for Gaming}
Moisture % | 12 |
Metabolizable Energy Kcal/lb | 1205 |
Crude Protein % | 28 |
Crude Fat % | 3 |
Available Phosphorous % | 0.52 |
Zinc mg/lb | 25 |
Iron mg/lb | 11.25 |
Quail Starter 0-6 Weeks
Moisture % | 12 |
Metabolizable Energy Kcal/lb | 1249 |
Crude Protein % | 23 |
Crude Fat % | 3 |
Pyridoxine mg/kg | 4 |
Thiamin mg/lb | 1.5 |
Iodine mg/lb | 1 |
Quail Developer Feed 6-16 Weeks (at flight)
Moisture % | 12 |
Metabolizable Energy Kcal/lb | 1249 |
Crude Protein % | 20 |
Crude Fat % | 3 |
Folic Acid mg/lb | 0.25 |
Pyridoxine mg/kg | 4 |
Thiamin mg/lb | 1.5 |
Iodine mg/lb | 1 |
Copper mg/lb | 1.15 |
Layer Quail Starter Feed 0-6 Weeks (for Layer Quails)
Moisture % | 12 |
Metabolizable Energy Kcal/lb | 1249 |
Crude Protein % | 23 |
Crude Fat % | 3 |
Riboflavin mg/kg | 4 |
Niacin mg/kg | 40 |
Selenium mg/lb | 0.023 |
Layer Quail Developer Feed 6-20 Weeks (for Layer Quails)
Moisture % | 12 |
Metabolizable Energy Kcal/lb | 1249 |
Crude Protein % | 18 |
Crude Fat % | 3 |
Niacin mg/kg | 40 |
Biotin mg/lb | 0.025 |
Pantothenic Acid mg/lb | 7.50 |
Layer Quail Developer Feed 20 + Weeks (for Layer Quails)
Moisture % | 12 |
Metabolizable Energy Kcal/lb | 1249 |
Crude Protein % | 19 |
Crude Fat % | 3 |
Biotin mg/lb | 0.025 |
Selenium mg/lb | 0.023 |
Coturnix Quail Starter Feed 0-6Weeks (for Layer / Broiler Quails)
Moisture % | 12 |
Metabolizable Energy Kcal/lb | 1249 |
Crude Protein % | 24 |
Crude Fat % | 3 |
Iodine mg/lb | 1 |
Copper mg/lb | 1.15 |
Zinc mg/lb | 25 |
Iron mg/lb | 11.25 |
Coturnix Quail Finisher Feed 6 Weeks to Market (for Broiler Quails)
Moisture % | 12 |
Metabolizable Energy Kcal/lb | 1249 |
Crude Protein % | 18 |
Crude Fat % | 3 |
Vitamin E IU/kg | 30 |
Vitamin K mg/kg | 0.60 |
Pyridoxine mg/kg | 4 |
Coturnix Quail Layer Feed 6 Weeks + (for Layer Quails)
Moisture % | 12 |
Metabolizable Energy Kcal/lb | 1249 |
Crude Protein % | 18 |
Crude Fat % | 3 |
Folic Acid mg/lb | 0.25 |
Pyridoxine mg/kg | 4 |
Thiamin mg/lb | 1.5 |
Iodine mg/lb | 1 |
Quail Layer Feed
Moisture % | 12 |
Metabolizable Energy Mj/kg | 11.3 |
Crude Protein % | 19 |
Crude Fat % | 3 |
Vitamin A IU/kg | 10000 |
Vitamin D3 IU/kg | 2000 |
Selenium mg/kg | 0.30 |
Quail Breeder Feed
Moisture % | 12 |
Metabolizable Energy Mj/kg | 11.3 |
Crude Protein % | 19 |
Crude Fat % | 3 |
Iron mg/kg | 60 |
Manganese mg/kg | 90 |
Selenium mg/kg | 0.30 |
Bob White Quail Starter Feed 0 – 6 Weeks
Crude Protein % | 28 |
Metabolizable Energy Kcal/lb | 1300 |
Calcium (%/lb) | 0.90 |
Non Phytate Phosphorous (%/lb) | 0.45 |
Sodium (%/lb) | 0.18 |
Selenium mg/lb | 0.136 |
Bob White Quail Grower Feed 6 – 10 Weeks
Crude Protein % | 24 |
Metabolizable Energy Kcal/lb | 1250 |
Calcium (%/lb) | 0.80 |
Non Phytate Phosphorous (%/lb) | 0.38 |
Thiamin mg/lb | 0.8 |
Riboflavin mg/lb | 2.4 |
Zinc mg/lb | 40 |
Iodine mg/lb | 0.4 |
Selenium mg/lb | 0.136 |
Bob White Quail Finisher / Holding > 10 Weeks
Crude Protein % | 20 |
Metabolizable Energy Kcal/lb | 1225 |
Calcium (%/lb) | 0.70 |
Manganese mg/lb | 35 |
Iodine mg/lb | 0.4 |
Selenium mg/lb | 0.136 |
Bob White Quail Breeder Feed
Crude Protein % | 18 |
Metabolizable Energy Kcal/lb | 1280 |
Calcium (%/lb) | 2.6 |
Iron mg/lb | 20 |
Copper mg/lb | 5 |
Zinc mg/lb | 40 |
Iodine mg/lb | 0.4 |
Selenium mg/lb | 0.136 |
Japanese Quail Starter / Grower Feed 0 – 6 Weeks
Crude Protein % | 26 |
Metabolizable Energy Kcal/lb | 1315 |
Calcium (%/lb) | 0.80 |
Folic Acid mg/lb | 1 |
Zinc mg/lb | 30 |
Iodine mg/lb | 0.2 |
Selenium mg/lb | 0.136 |
Japanese Quail Finisher Feed 6 Weeks to Market
Crude Protein % | 19 |
Metabolizable Energy Kcal/lb | 1315 |
Calcium (%/lb) | 0.70 |
Vitamin B12 mcg/lb | 4 |
Biotin mcg/lb | 40 |
Manganese mg/lb | 25 |
Iron mg/lb | 30 |
Copper mg/lb | 5 |
Japanese Quail Breeder Feed
Crude Protein % | 20 |
Metabolizable Energy Kcal/lb | 1315 |
Calcium (%/lb) | 2.5 |
Methionine + Cystine (%/lb) | 0.70 |
Lysine (%/lb) | 1.0 |
Threonine (%/lb) | 0.74 |
Tryptophan (%/lb) | 0.19 |
GENERAL DETAILS | Specification |
Ingredients | Corn Gluten Meal, Wheat Gluten, Soy Meal, DDGS, Grains, Pluses, Essential Amino Acids, Vitamins, Minerals, Trace Minerals, Toxin Binders and Mold Inhibitor |
Ingredient Profile | 100% Vegetarian |
Moisture (% Maximum) | 12 |
Product Form | Coarse Mash Form / Pellet Form |
Product Branding | Yembroos® |
Net Weight | 39 Kgs When Packed |
Product Pricing | On Unit Basis (for each 39 Kgs Packing) |
Production Capacity per Day | 650 MT/Day |
Factory Visit | Not Permissible |
Fumigation | Aluminum Phosphide or Methyl Bromide (or any as per buyer specification) |
Clinical Test Methodology | As per IS:2052 Proximate Analysis on Dry Matter Basis |
Yembroos Animal Feeds India Private Limited is a leading Quail Feed Manufacturer, Quail Feed Exporter, Quail Feed Supplier, Quail Feed Distributor, Quail Feed Vendor, Quail Feed Company, and Quail Feed Producer based in India. Recognized for our precision-formulated nutrition solutions, we are one of the most reputed Quail Feed Manufacturers, Quail Feed Exporters, Quail Feed Suppliers, Quail Feed Distributors, Quail Feed Vendors, Quail Feed Companies, and Quail Feed Producers across the country.
We offer a comprehensive range of Quail Feed Nutrition Solutions tailored for commercial and specialized quail farms, eliminating the need for additional quail feed supplements, additives, or external inputs. Our range includes Quail Pre-Starter Feed, Quail Starter Feed, Quail Grower Feed, Quail Finisher Feed, Quail Breeder Feed, Quail Fattener Feed, Organic Quail Feed, Quail Parent Stock Feed, Quail Hatchery Feed, Commercial Quail Farm Feed, and customized nutrition profiles aligned with modern quail farming practices.
Yembroos is also a distinguished Broiler Quail Feed Manufacturer, Broiler Quail Feed Exporter, Broiler Quail Feed Supplier, Broiler Quail Feed Distributor, Broiler Quail Feed Vendor, Broiler Quail Feed Company, and Broiler Quail Feed Producer, delivering performance-enhancing nutrition to meat-producing quail farms across India and abroad. For egg-laying quail, we are the preferred Layer Quail Feed Manufacturer, Layer Quail Feed Exporter, Layer Quail Feed Supplier, Layer Quail Feed Distributor, Layer Quail Feed Vendor, Layer Quail Feed Company, and Layer Quail Feed Producer.
Our 100% vegetarian and organic formulations are trusted by breeders and farmers for Layer Quail Feed, Quail Laying Feed, Bobwhite Quail Feed, Coturnix Quail Feed, Japanese Quail Feed, and other species-specific nutritional profiles. With a commitment to scientifically balanced quail nutrition, Yembroos remains the go-to partner for complete, reliable, and advanced quail feeding solutions.